
 >
>
Are the exterior rubber housing covers on your Bose SoundSport wireless earbuds visibly damaged? Do you see visible cracks, splits, or tears on the earcup rubber housing, a peeling or flaking outer layer, missing sections of the housing, or a sticky exterior? If you’re experiencing any of these issues, it’s time to replace the exterior rubber earcup housing on the Bose SoundSport Wireless earbuds.
In this DIY repair guide, we show you how to replace the torn, peeling, or sticky exterior rubber housing cover on the Bose SoundSport wireless earbuds with OEM spare parts. You will find all the tools needed for this repair, along with OEM replacement parts, below.
Want to get your earbuds repaired by a professional? Send us your Bose SoundSport Wireless earbuds, and our repair ninjas will restore your device to peak working condition. Follow the link, select the issues you’re experiencing, click Continue, enter your email ID, and click Get My Estimate to view the repair cost instantly.
Here are the video tutorials for replacing the cracked, peeling, or sticky left and right exterior rubber housing covers on the Bose SoundSport Wireless earbuds. The process is the same for both sides. We will highlight the key differences to remember when repairing the earbuds yourself.
Easy / Requires 30-45 minutes per side.
This repair requires careful handling of delicate internal components, including wires, connectors, speaker driver, and battery. You don’t need technical skills or prior experience to complete this repair. With the right tools, a bit of patience, and attention to detail, you can replace the worn-out exterior rubber housing covers on the Bose SoundSport Wireless earbuds.
Restore the form, functionality, and comfort of your Bose SoundSport Wireless earbuds with original replacement parts. Select the OEM spares from the drop-down menu below and bring your device back to peak working condition.
Get an OEM replacement exterior rubber housing cover for your Bose SoundSport Wireless earbuds today. Click the link to visit our store, then scroll down to the Customers Also Add section to purchase the original replacement part and the tools you’ll need for this repair at a discount.
Before starting the Bose SoundSport Wireless exterior rubber housing cover replacement, gather the following tools. Using the correct instruments will help you complete the repair successfully. We used the following tools and recommend them for a safe, professional-quality DIY repair at home.
Not ready to invest in tools yet? Find your device in our repair catalog, select the issues it’s experiencing, and send it to us. Our repair ninjas will restore your device to peak working condition.
In this detailed DIY repair guide, we show you how to replace the cracked, peeling, or torn exterior rubber housing cover on the Bose SoundSport wireless earbuds yourself. Follow each step carefully and use the accompanying images as a visual guide to complete the repair with confidence.
This process is essentially the same on both sides. There are different parts inside each earbud that you need to be careful of, and one side has a charging port while the other does not.
Start by removing the rubber portion of the side cover by peeling it off the plastic housing. We will be replacing the whole plastic and rubber side cover.
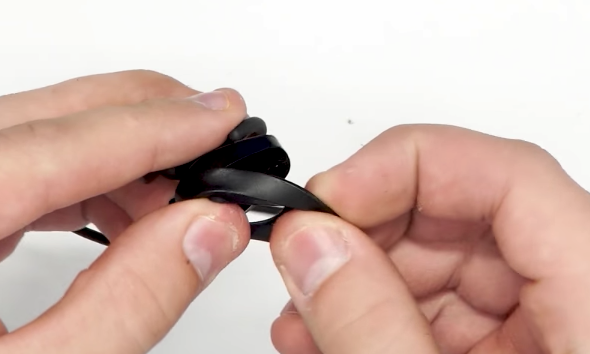
2.1. Apply heat to the circumference of the plastic housing for about 5-10 seconds with a heat gun. This helps soften the glue that is holding the side cover in place.
Professional Advice: Don't use excessive heat above 300 degrees Fahrenheit or hold the earbud under the hot air for more than 10 seconds at a time. If you do either of those, you may damage the earbuds beyond repair.
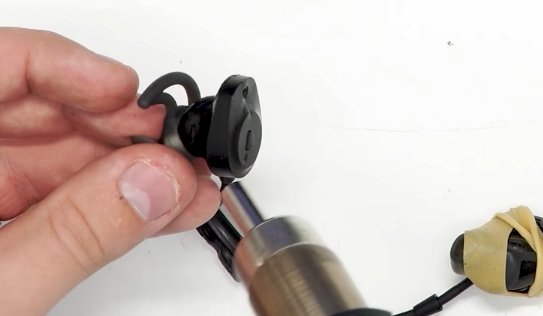
2.2 Insert your thin pry tool into the base of the side cover and gently pry up. Work your way around the side cover. This will take a few minutes. Be patient and don't rush. If you need to apply more heat partway through, go for it.
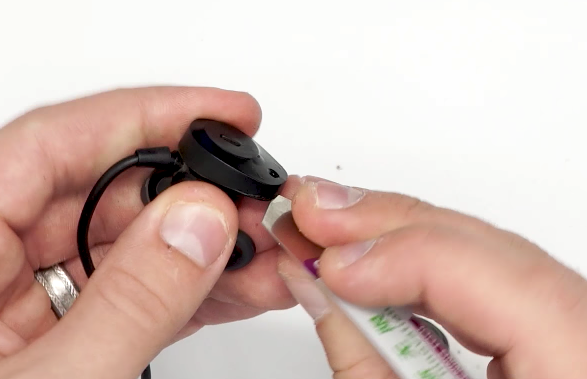
2.3. After prying around the whole side cover, it should come off with finger strength by just pulling it away from the earbud.
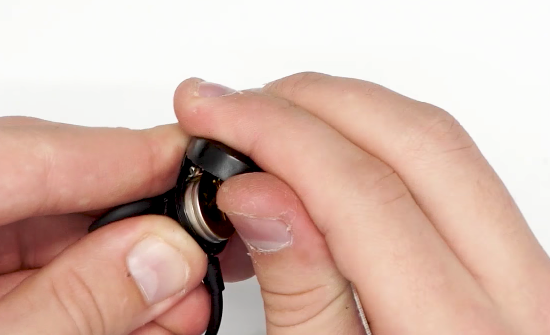
3.1. Before attaching the new cover, clean any old glue residue on the lip of the main housing. We typically use a Small Flat Edge Screwdriver to remove the residue.
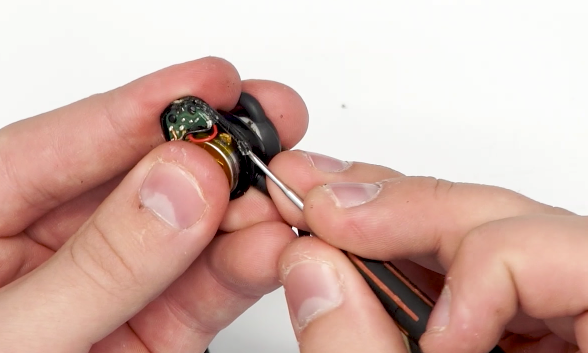
3.2. Once you have cleaned the residue from the housing, test fit the new side cover to make sure that it fits onto the main housing with no gaps. Continue cleaning the residue off the housing until the side cover fits evenly.
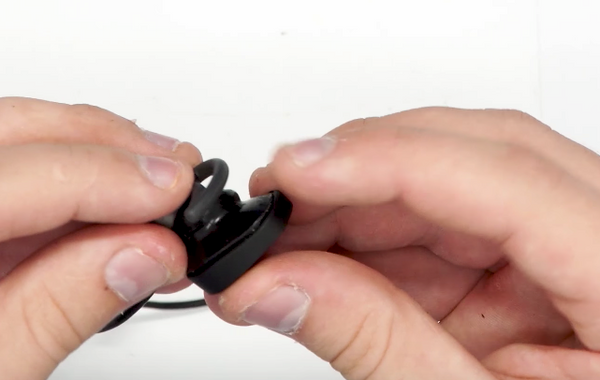
4.1. Apply a thin line of B7000 Glue around the lip of the main housing, then slide your side cover into place.
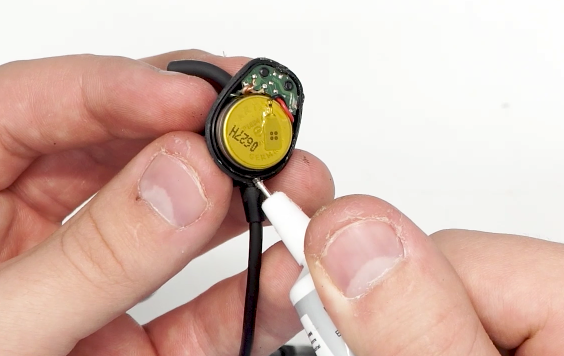
4.2. Once you have seen that the side cover is evenly placed on the main housing, wrap a rubber band around the whole earbud so that it applies even pressure to the new side cover.
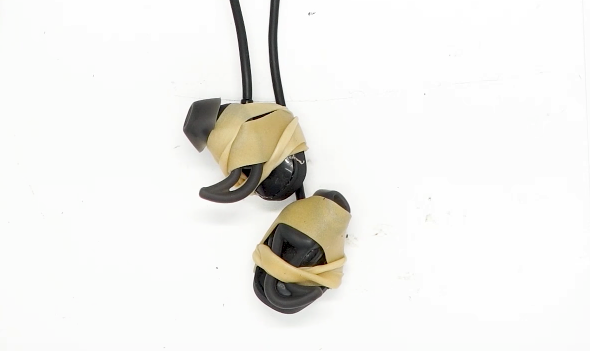
Pro Tip: Let the glue dry for 30 minutes, then remove the rubber band and clean the excess glue.
You have successfully replaced the torn, peeling, and sticky exterior rubber housing covers on the Bose SoundSport Wireless Bluetooth earbuds. Check the audio quality, buttons, and Bluetooth pairing to confirm the device is working properly.

If you found this guide helpful and would like to try your hand at DIY gadget repair, visit our store for essential tools and spare parts. You can also check out our at-home DIY earbud repair guides for other popular brands, including Apple, Beats, Bose, and Sony.
Have questions or suggestions about this repair? Text a repair ninja or email us, and we’ll reply shortly.