 >
>
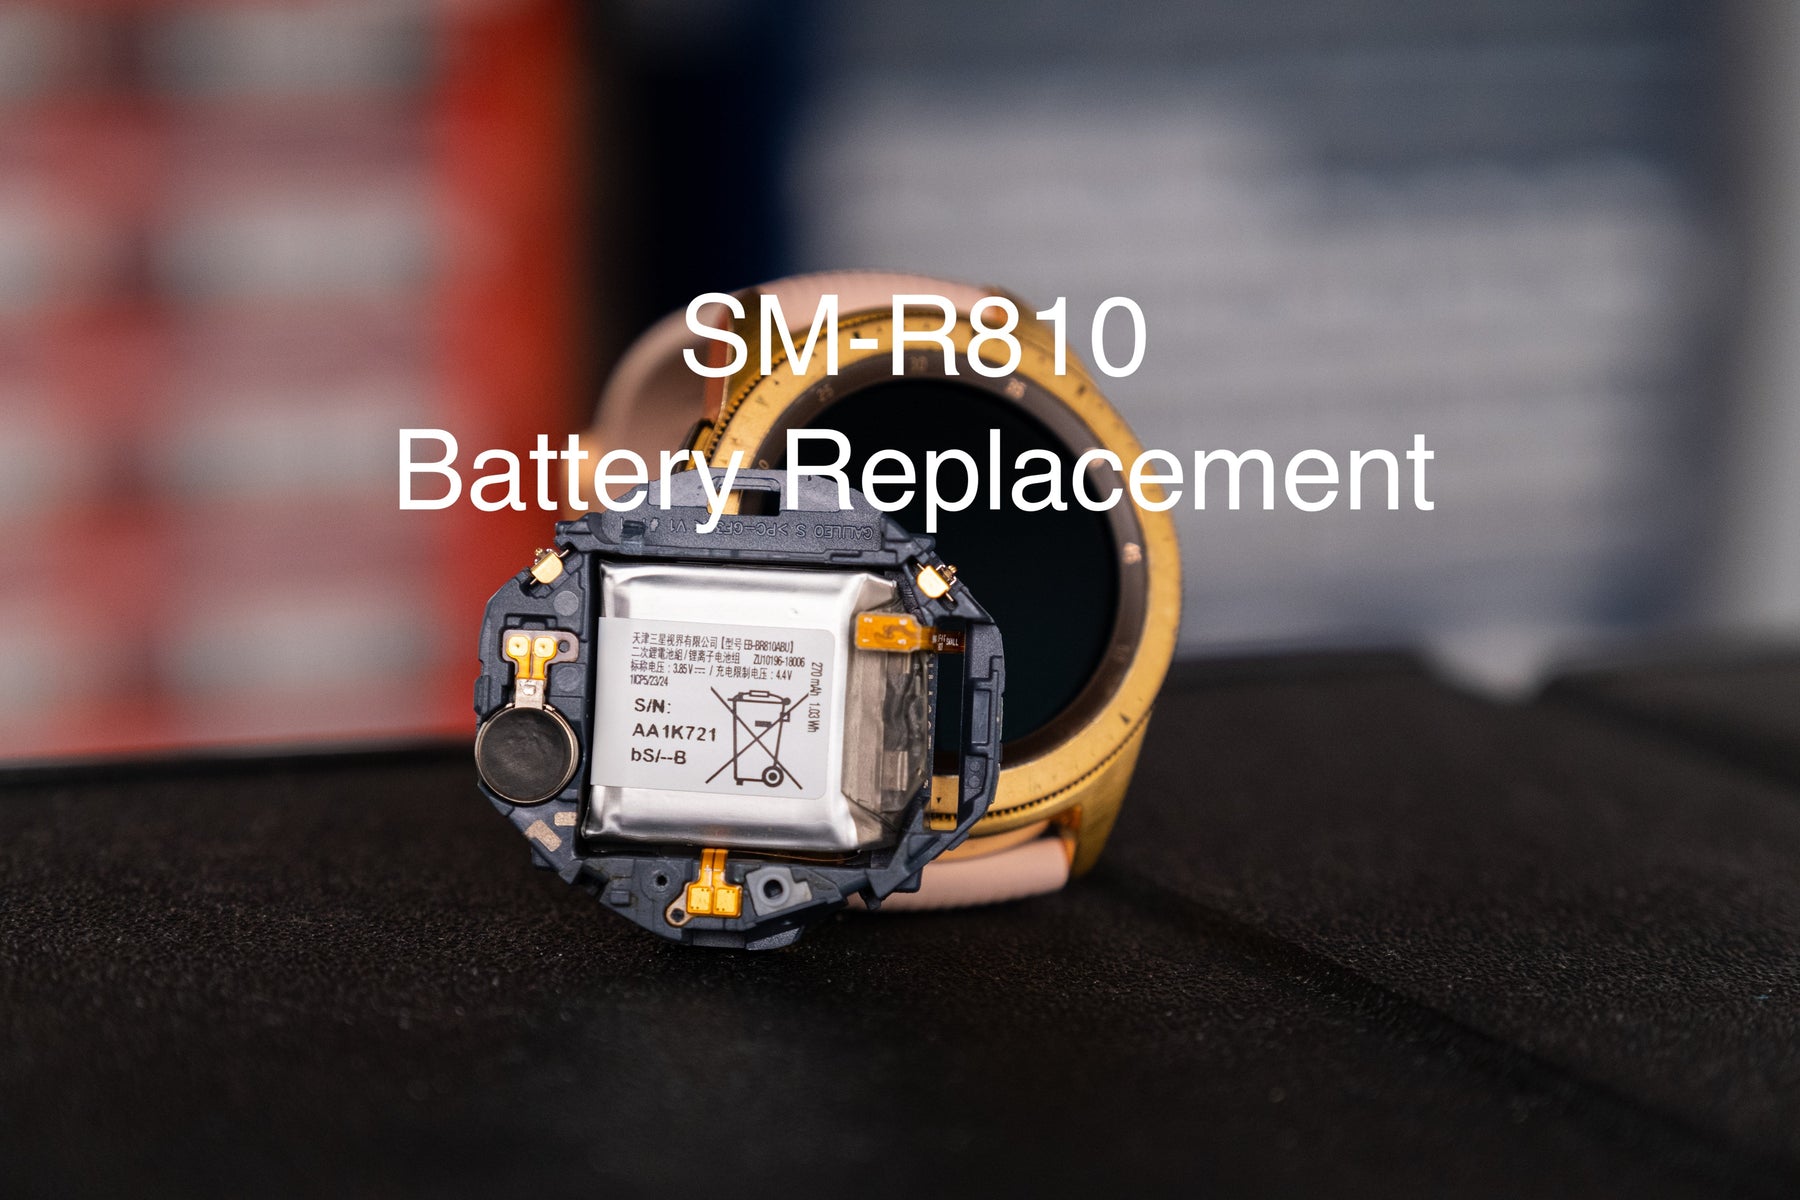
How to Replace the Battery on a Samsung SM-R810 Galaxy Smart Watch
If the battery on your Samsung Galaxy Watch SM-R810 is dying quickly or the watch will not turn on unless it is on the charger or dies shortly after being removed from the charger, it is likely that your battery needs to be replaced.
If you would prefer to read a written repair guide, check that out below. Or if the tool cost seems prohibitive for a one time repair and you would prefer that we complete this repair for you, check out our Repair Catalog to see if we offer repair services for this device.
Are you a business? We offer wholesale discounts on our repair services if you are sending numerous units in for repair or want to send us continuing batches of devices for repair on a regular basis. Contact our support team for more info Info@JoesGE.com (This email is only for wholesale inquiries, please contact Support@JoesGE.com for other inquiries).
_____________________________________________
Repair Difficulty: Easy
Time to complete: 30 Minutes
The tools and parts that you will need for this repair:
- A Replacement Battery
- Repair Kit (This includes the Y screwdriver and Flat edge screwdriver)
- 2.0mmx25mm Y Screwdriver
- A Small Flat Edge Screwdriver
- Small Phillips Screwdriver
- Nylon Spudger Tool (For unlocking ribbon connectors and doing other tasks that require a non conductive tool)
- Some 704 RTV Glue for the back cover
_____________________________________________
1. Remove the Back Cover
Start by removing the strap from your watch, then, remove the four screws in the back cover using your 2.0mmx25mm Y Screwdriver. They can be hard to remove so apply lots of pressure to keep the screwdriver securely seated into the screws so as to avoid stripping out the heads.

With the screws removed, all that is holding the back cover on is some adhesive. You can pry it loose by using a Small Flat Edge Screwdriver stuck into the edge of the casing at the bottom of the watch. Gently pry it up and work your way around the back casing until it is free. *Be careful of the heart rate sensor ribbon cable that is attached to the motherboard*

Using your Nylon Spudger tool, disconnect the heart rate monitor ribbon cable from the motherboard. It simply connects straight down to the motherboard. (It might also be helpful to Watch This Part in the Video) The back cover should be free from the motherboard once this ribbon cable is disconnected.

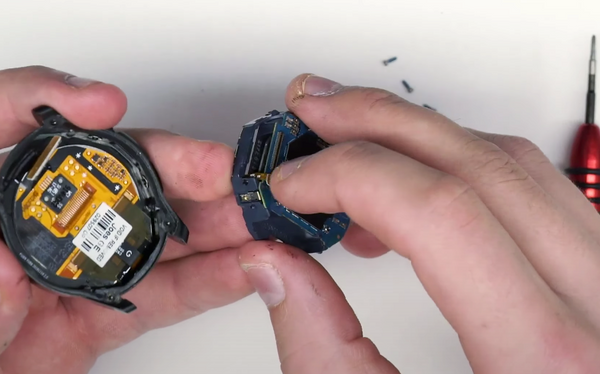
2. Detach the Screen From the Motherboard
Start by unclipping the two ribbons at the bottom of the motherboard using your Nylon Spudger tool.

Next, use your Flat Head Screwdriver to separate the motherboard from the screen assembly. There is a notch at the top of the motherboard where you can stick the screwdriver. **Do not try to fully remove the motherboard until the next step**

Pull the two ribbon cables at the bottom of the mother board out and back towards the exterior of the watch then slowly lift the motherboard away from the screen assembly while feeding the ribbon cables through the slot in the motherboard. (It might be helpful to Watch This Part of the Video)

3. Remove the Battery from the Battery Housing
Remove the black Phillips head screw that holds the motherboard to the battery.

Using your Nylone Spudger gently pry away the motherboard from the battery on the opposite side of the board from the two ribbon cables. Once the motherboard is loose, gently pry away the two buttons on the side of the watch then remove the motherboard from the battery housing.


Using your spudger, pry up the battery out of its housing. It is only held in with adhesive.

With the battery free, pry up the power contacts that are attached to the battery housing starting at the outer edge, this will allow the battery to come out of the housing.

4. Install the New Battery, Motherboard, and Screen
Line the charging connections up with their place in the battery housing and press the new battery and the charging connections into their places.

Place the motherboard back onto the housing and press the two buttons into their places then reinstall the Phillips head screw that holds the motherboard into place.


Re-attach the small square ribbon cable to the motherboard, then bend the ribbon cable on the new Replacement Screen back, then slide it through the slot in the motherboard.

Before you push the motherboard assembly back into its place, make sure that the buttons are properly in place. Both the ribbon cable buttons that attach to the motherboard, and the physical plastic buttons can move when reinstalling the board and either rip the ribbon or cause the motherboard assembly to not sit in the screen housing properly. Once you have determined that the buttons are lined up properly, push the motherboard into its place, you should hear a click when it is locked in place.

Re-attach the screen ribbon cable to the motherboard. Make sure that it is properly lined up then lightly push the connector down to secure it.

5. Test the Watch
Before you re-install the back cover, turn the watch on and make sure that the screen, buttons, and rotating bezel all function properly.

6. Reinstall the Back Housing
Double check that the two ribbon cables on the motherboard are securely connected.

Apply a thin line of 704 Glue around the edge of the back cover. Make sure that the glue is one continuous line with no breaks to get the best water seal. You don't need lots of glue as there is already a seal around the back cover.

Re attach the HR monitor ribbon cable to the motherboard. Then re-seat the back cover into the main housing and push down on the cover. If it will not clip into place, its likely because the motherboard assembly is not fully seated in place. If that happens, remove the back cover and HR ribbon and make sure the motherboard is seated properly. If any glue comes out of the sides when you place the back cover on the watch, you can wipe it away with a rag or Q tip and some rubbing alcohol.


Re-insert the four screws into the back cover of the watch so that they are snug. Once you have reinserted the screws, you are good to get back to wearing the watch. We would recommend giving the watch a couple of hours to cure before getting it wet.

8. Get back to enjoying your gear 🤓