JBL Link 20 Charge Port PCB Replacement
Has your JBL Link 20 stopped charging? This guide shows you how to install our custom manufactured replacement charge port PC
If you would prefer to read a written repair guide, check that out below. Or if the tool cost seems prohibitive for a one time repair and you would prefer that we complete this repair for you, check out our Repair Catalog to see if we offer repair services for this device.
Are you a business? We offer wholesale discounts on our repair services if you are sending numerous units in for repair or want to send us continuing batches of devices for repair on a regular basis. Contact our support team for more info Info@JoesGE.com (This email is only for wholesale inquiries, please contact Support@JoesGE.com for other inquiries).
_____________________________________________
🚥 Repair Difficulty: Moderate
(Tedious repair working with small ribbon cables, no soldering required)
⏰ Time to complete: 45-60 minutes
🛠 The tools and parts that you will need for this repair:
(If the tool cost seems prohibitive, check out our Repair Catalog to see if we offer repair services for this device.)
Add all, remove what you don't need
- A Replacement Charge Port PCB
- Strong Pry Tool (a guitar pick, or the dull side of a butter knife can also do the trick)
- A Small Phillips Screwdriver
- Repair Kit
_____________________________________________
1. Remove the PCB cover
Lift the edge of the bottom rubber cover using your finger, then slide your pry tool underneath it.

Pull the rubber cover up and away using your pry tool and fingers. Its held on by adhesive, that you will reuse later so keep the adhesive as clean as you can.

There are two smaller covers on the bottom of the speaker, remove the one with 4 screws holding it in.

It can be a pain to remove the cover once the screws are out. Just flip the speaker upside down and give it a tap on the table top. If that doesn't work, you can stick your screwdriver in one of the screw holes to lift it up at an angle.


2. Remove the Bottom Cover
Remove the 4 screws, one in each corner of the bottom cover that hold the bottom of the speaker in its place. These screws are different from the ones holding the smaller cover in place, so keep them separated.

Lift the cover up and away, being careful of the wires underneath it.


Unplug the charge port plug by pulling it straight out from its connector.

Use your screwdriver to gently lift the clips that hold the two ribbon cables in their place. The clips are very fragile but the front of the clip should lift up and away from the PCB fairly easily allowing you to slide the ribbon cables out.

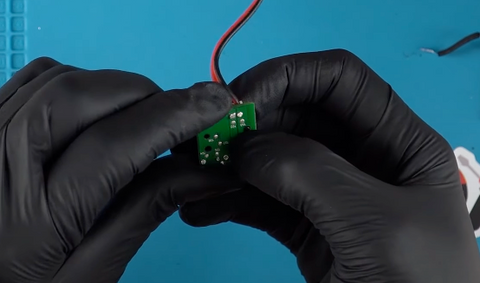
3. Install the New PCB
Gently pull the charge port PCB and two wires through the hole in the bottom cover.

Unplug the ribbon cable from its connector on the charge port PCB using your fingernail or screwdriver to lift the clip.

Remove the black plastic piece from the charge port PCB by pushing the 4 pins out from the back.
Install the plastic piece onto your new charge port PCB by lining up 2 of the 4 pegs with their holes then pushing it into place.

Carefully install the ribbon cable into your new charge port by sliding it in, then closing the clip.

Slide the ribbon cable and power wire through the hole in the bottom cover then lay the PCB flat into its place, making sure that neither of the wires are pinched.


When the PCB is properly in place, the charge port should be flush with its hole in the plastic housing and fully visible.

Put the cover on over the charge port then double check to see if the PCB moved out of place. It can take a few tries to get it to stay seated so that you can install the screws.

If necessary, you can gently nudge the metal edge of the charge port through the hole in the housing to get it into place. If you do this, be very careful to not apply pressure to the plug in the center of the charge port as you could break it.

Once the PCB is aligned, install the 4 screws, starting with the two in the middle that hold the PCB in place.

4. Replace the Bottom Cover
Plug the 3 wires back into their connectors on the main PCB. The slightly larger ribbon cable that comes from the charge port PCB, plugs in to the slot right next to the blue connector where the charge port connects.


Line up the bottom cover with the speaker, then apply downward pressure to lock it into place.

Install the 4 corner screws into the bottom cover.

Re-install the rubber bottom with the dot of the JBL exclamation point facing towards the charge port.

5. Get back to enjoying your gear 🤓