 >
>
PlayStation 4 PS4 Pro Optical Disc Drive Replacement
If your PS4 is not reading game discs well or at all, its likely that your disc drive will need to be replaced. Let's fix it!
If you would prefer to read a written repair guide, check that out below. Or if the tool cost seems prohibitive for a one time repair and you would prefer that we complete this repair for you, check out our Repair Catalog to see if we offer repair services for this device.
Are you a business? We offer wholesale discounts on our repair services if you are sending numerous units in for repair or want to send us continuing batches of devices for repair on a regular basis. Contact our support team for more info Info@JoesGE.com (This email is only for wholesale inquiries, please contact Support@JoesGE.com for other inquiries).
_____________________________________________
Repair Difficulty: Moderate
Time to complete: 1-2 hours
The tools and parts that you will need for this repair:
- A Replacement Disk Drive (We do not currently offer them for sale)
- T8 Screwdriver
- A Small Phillips Screwdriver
- Some Precision Tweezers (In case you drop screws into tight spaces in the console)
- Anti-Static Parts Organizer Mat (Recommended, not required)
- A rag that can get thermal paste on it
- Some rubbing alcohol
_____________________________________________
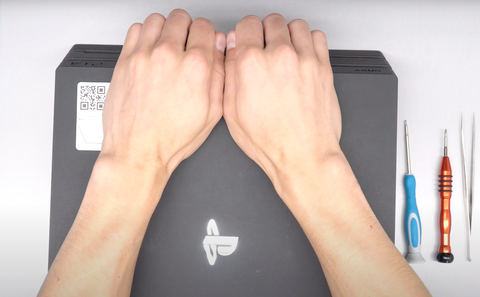
1. Remove the top housing
Lift from the center under the topmost ridge in the front of the console until it pops out of the connectors then, move to the corners and lift until you hear a pop. It might be easier to Watch This Part in the video. The cover should be loose and you can carefully slide it forward and off of the console.

2. Remove the Exterior Screws
There are 3 screws that you will need to remove from the back of the console. One of them is covered by a plastic cover. Remove the cover by pulling it up and away from the back of the console like so. (It could also be helpful to Watch This Part in the Video).

With the cover removed, you can unscrew the 3 black screws at the back of the console.

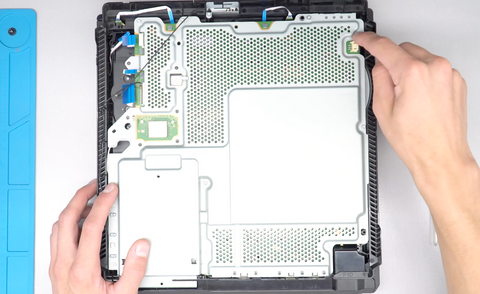
3. Remove the Bottom Case
Start by popping up the left side of the case, then the right side, then the center. It would likely be very helpful to tune into the Video for this part as well.


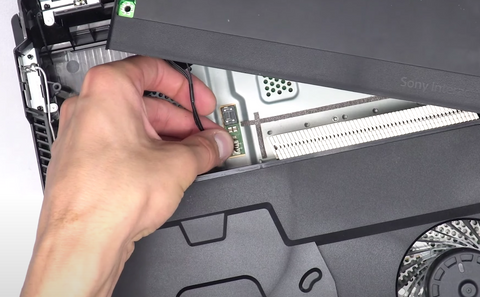
4. Unplugging the many cables
Flip the console over and remove the 3 antenna wires by gently pulling them straight up and away from their connectors.


Next, disconnect all of the ribbon cables and fan plug from the motherboard.

The large ribbon on the bottom right comes loose after you flip up the latch on the connector with your finger nail.

The rest of the ribbon cables and the fan plug can be removed by gently pulling them out of the sockets.

5. Removing the Heatsink
Unscrew the single screw that holds the hard drive in place, then remove the hard drive. (Remember what orientation that hard drive was in so that it is easier to put back in later).

Remove all 11 of the T8 screws from the silver heatsink.
Remove the 11 black Phillips head screws from the heatsink.

Remove the metal heatsink slowly, making sure that no wires catch on it as you lift it away from the console.

Remove the 8 Phillips head screws from the smaller heatsink shield and lift it away from the motherboard using your tweezers.


Remove the 4 screws that hold the heatsink in place then remove it and the plastic piece underneath it.


6. Remove the Power Supply
Remove the 5 screws that hold the power supply in place from the top.

Similarly to removing the top case, start by popping one side of the power supply up with your hands, then the other side. Once again, it might be helpful to see this part in Video Form. **There is a wire attached to the power supply. Once you have the power supply popped out, do not pull it entirely away from the console.


Disconnect the wire that is attached to the main board by gently pulling it straight up and out from the motherboard.
7. Getting to the Fan
Flip the console over so that the motherboard is facing upwards. At this point, it will be loose, so make sure to hold it when you flip over the console.
Then, gently remove the motherboard, making sure that it does not snag any wires as you remove it.

Remove the 2 screws that hold the large metal heatsink in place.

Remove the heatsink and clean out any dust that might be clogging it.

8. Replacing the Optical Drive
Remove the 6 screws holding the optical drive in its place then gently lift it out of the console.


Place the new drive into the console making sure to avoid pinching any of the ribbon cables and secure it in place with the six screws.

9. Cleaning Your Fan
While you are this deep into your PS4, you might as well clean your fan. Remove the 2 screws that hold the fan in place then lift the fan out of the console.

If your fan just needs to be cleaned out, but still spins freely, clean your fan. If the fan does not spin then coast for a short period of time, it needs to be replaced.

10. Reassemble the Motherboard
Secure the new fan into its place with the 2 screws then, clean the thermal paste off of the heatsink using a rag.

Wipe the heatsink surface down with some rubbing alcohol on your rag.

Place the heatsink back into the console, being careful not to damage any ribbon cables or plugs then, replace the 2 screws that hold it in place.

Clean the thermal past off of the processor on the motherboard using your rag. Be very gentle when cleaning on and around the processor. If there are chunks of dried thermal paste around the CPU, use your tweezers to carefully remove them. The area around the CPU does not need to be perfectly clean, just make sure that the top of the CPU is clean.


Add a small line of thermal paste onto the length of the processor and a small dab in the center of the heatsink contact pad.


Place the motherboard back into its spot in the console being careful to not damage any wires. Once it is secured in place, add the plastic piece and X shaped metal heatsink back onto the board and secure them with the 4 screws.
Lastly, secure the heatsink brace cover with its 8 screws.


11. Reinstall the Power Supply
Before re installing the power supply, check to make sure that it is free of dust and cobwebs. Take the time to clean it thoroughly with a rag, tweezers, and compressed air if it is dirty.
Connect the small wire on the power supply into its spot on the motherboard.

Set the power supply in place and gently push down until you hear a click as it snaps in place.

Reinstall the metal heat shield onto the bottom of the power supply and install the 5 T8 screws.


12. Finishing the Reassembly
Connect all of the cables back to the motherboard starting with the large ribbon cable that has the latch. Slide the rest of the ribbons and the fan connector into their spot. Make sure to lock the latch on the first cable by pushing it down flat until it clicks into place.

Place the metal heatsink over the motherboard and screw it into place being careful to not pinch any of the antenna wires that still need to be connected.
There are 22 total screws holding this in place, start with the 11 Phillips screws.

Secure the 3 antenna wires into their places.


Re insert the hard drive into its spot and install the screw that holds it in place.
Reinstall the bottom plastic piece by setting it on the console a bit towards the front then slide it towards the back of the console while keeping the back part of the plastic elevated from the rest of the console. Once again, it might be helpful to see This Part in the Video.

Once the bottom shell is aligned vertically with the top shell, snap it into place until you hear a click on each corner and center of the back.

Reinstall the 3 black screws into the back of the console.

Reinstall the plastic hard drive slot cover on the back of the console.

Reinstall the top shell similarly to the bottom shell except you slide it forwards from the back of the console. After it is aligned, make sure all of the snap lock connectors are secured around the edge of the shell.
